TL;DR:
A beginner-level exploration of a ClojureScript REPL session complete with mistakes of the type made by me so that you might avoid these common pitfalls when starting your own ClojureScript adventures.
I love the interactivity of working with code in a Clojure(Script) REPL (REPL = “read-evaluate-print-loop”). Understanding a few basic concepts can help ease the learning curve and give you the tools to bootstrap further exploration. I hope this annotated transcript gives you a headstart in your own ClojureScript REPL explorations!
ClojureScript Quick Start
This session is based on the
ClojureScript Quick Start guide which illustrates how to configure a simple ClojureScript project without the need for external tools (like Leiningen). If you’re new to ClojureScript, the
ClojureScript Quick Start guide is essential reading and you should read that first or this post won’t make much sense.
Warning! ClojureScript is under heavy development so be aware that if something below doesn’t work it’s probably because you are using an older version of ClojureScript that is missing features available in a newer build. Code in this post is guaranteed to work if you setup your code as described in the
ClojureScript Quick Start (which at the time of this article is based on ClojureScript build 3162). I
strongly recommend that if you’re new to ClojureScript that you start with this simplified setup and then use build tools like Leiningen or Boot once you understand how namespaces work and you’re comfortable debugging namespace dependency issues.
Adding to the Project
Let’s begin where the ClojureScript Quick Start project left off with a directory named hello-world which contains:
- An
index.html file
- A
repl.clj file
- A
src directory containing a core.cljs file
Here’s what your core.cljs should look like (I’ve added a couple of small things so have something more to work with).
(ns hello-world.core
  (:require [clojure.browser.repl :as repl]))

(defonce conn
  (repl/connect "http://localhost:9000/repl"))

(enable-console-print!)

(println "Hello Cruel World!")

(defonce init-state {:text "Hello, this is: " :numbers ["one" "two" "four"]})

(defonce app-state (atom init-state))

(defn foo [a b]
  (* a b))

(defn bar [d e]
  (+ d e))
I’ve setup a GitHub repo with the code ready to go (remember to copy the standalone cljs.jar file into the top-level /hello-world/ directory if you clone the repo or nothing will work!).
Starting the ClojureScript Browser REPL
Start a REPL from terminal.app as you did in the Quick Start guide:
=> rlwrap java -cp cljs.jar:src clojure.main REPL.clj
Compiling client js ...
Waiting for browser to connect ...
(in Chrome go to: http://localhost:9000) and then in the REPL you just started you should see:
Watch compilation log available at: out/watch.log
To quit, type: :cljs/quit
If you don’t see the Watch compilation log message right away try refreshing your browser – depending on your configuration it can take a couple of tries to establish a connection.
If you got the ready message, Congrats! You’ve now got a REPL connected to your browser.
Now that we have a basic REPL setup, let’s take a moment to understand how the browser REPL system works:
- The
java command starts a Java Virtual Machine in terminal.app and loads the ClojureScript jar file (which contains the prebuilt ClojureScript core).
- The Clojure main function is invoked and using the information in the
repl.clj file it compiles the ClojureScript code including the hello-world/src/core.cljs file into JavaScript and copies it into the out directory.
- A basic web server is started on your
localhost and waits for connections on port 9000.
- The ClojureScript REPL server is started in JVM and waits for a connection from the browser (the REPL client).
- When a browser connects to
http://localhost:9000 the server delivers the JavaScript files, including:
- The Google Closure library which is responsible for JavaScript dependency management and optimizing JavaScript compliation. (note that this is “closure” not “clojure”).
- The compiled ClojureScript core library (originally contained in the
cljs.jar).
- The compiled files for your program.
- ClojureScript code typed into the REPL is compiled to JavaScript by the JVM running in the terminal.
- The JavaScript code is sent to browser REPL client for execution over port 9000.
- The result is sent back to the REPL server in the terminal and displayed.
First Explorations
OK, so now we know the how data flows from the terminal to the browser and back again, let’s figure out how to get around in the REPL.
Having a mental model of your current “location” in the REPL and how to access the vars and functions available is the key to using the REPL effectively. Our first goal then, is to find out which vars are available and how to call them.
When the REPL starts up we’re put into the default REPL namespace which is cljs.user. The first time you fire up the REPL cljs.user is empty but it does have some basic functions defined that have been brought in from the cljs.repl namespace. The first function we’ll use is dir which prints a sorted directory of public vars in a namespace. Let’s try it out:
cljs.user=> (dir cljs.user)
nil
Well, that’s not much help is it? What’s going on here? Like the Clojure function of the same name, dir is showing us the functions that are defined in the namespace cljs.user. Since there are no functions in this namespace we’re not seeing anything displayed in the REPL. Note that dir prints only the functions and vars in the specified namespace and not “all the functions available in all namespaces”. If we define a new var in the cljs.user namespace then we can use dir to see that it’s there:
cljs.user=> (def avariable :foo)
:foo
cljs.user=> (dir cljs.user)
avariable
nil
cljs.user=> avariable
:foo
So far so good. So how do we access code in another namespace like the vars or functions in our hello-world application? To access these functions we first need to require the namespace:
cljs.user=> (require '[hello-world.core :as hello])
nil
…and now we can explore the vars in the loaded namespace hello-world.core
cljs.user=> (dir hello-world.core)
app-state
bar
conn
foo
init-state
nil
Cool! You’ll recognize the functions from the file hello-world/src/hello-world/core.cljs. Next, let’s interact with our application as it is running in the browser:
cljs.user=> app-state
WARNING: Use of undeclared Var cljs.user/app-state at line 1 <cljs REPL>
nil
Bleck… why didn’t that work? The hint is in this part of the error: ...cljs.user/app-state. The call fails because we’re currently in the cljs.user namespace and we’re trying to call a var in the hello-world.core namespace.
Let’s try that again using the fully qualified name:
cljs.user=> (hello-world.core/app-state)
TypeError: hello_world.core.app_state.call is not a function
TypeError: hello_world.core.app_state.call is not a function
... elided ...
Crap. Still not working. What’s wrong? The hint is “…hello_world.core.app_state.call is not a function. This call fails because we’re trying to call the atom app_state as if it were a function. (ClojureScript is a lisp and assumes that the first item inside a set of parens is a function to be evaluated).
To get the contents of a var or atom at the REPL just use the name without parens:
cljs.user=> hello-world.core/app-state
#<Atom: {:text "Hello, this is: ", :numbers ["one" "two" "four"]}>
Yay! Alternatively we can switch to the namespace with in-ns and call the unqualified var name:
cljs.user=> (in-ns hello-world.core)
java.lang.UnsupportedOperationException: nth not supported on this type: Symbol
at clojure.lang.RT.nthFrom(RT.java:857)
at clojure.lang.RT.nth(RT.java:807)
... elided ....
at clojure.main.main(main.java:37)
Arrgh!! Balls. Now what’s happening? Turns out that in-ns (unlike dir) takes a quoted namespace name like so: (notice the quote symbol before hello-world.core)
cljs.user=> (in-ns 'hello-world.core)
nil
hello-world.core=> app-state
#<Atom: {:text "Hello, this is: ", :numbers ["one" "two" "four"]}>
So how do we know if a function takes a quoted symbol or not? I’m not sure… I will pose the question to a more experienced cljs developer and update when I know more.
It’s also useful to mention here that atoms in ClojureScript can be accessed using “@”, which is the way you’d commonly see it in most ClojureScript code[2]:
hello-world.core=> @app-state
{:text "Hello, this is: ", :numbers ["one" "two" "four"]}
Anyway, onwards! Let’s switch back to cljs.user so we have access to the REPL functions for the next step.
hello-world.core=> (in-ns 'cljs.user)
Let’s make a change to our application’s app-state:
cljs.user=>(swap! hello-world.core/app-state assoc :player1 "bob")
{:text "Hello, this is: ", :numbers ["one" "two" "four"], :player1 "bob"}
And if we query app-state we see that it did, indeed, update:
cljs.user=> hello-world.core/app-state
#<Atom: {:text "Hello, this is: ", :numbers ["one" "two" "four"], :player1 "bob"}>
Fun! Now’s a good time to see what’s happening in the browser…
Browser Explorations
In the Chrome tab where your application is running (i.e. the tab that loaded http://localhost:9000), open devtools (menu item: View -> Developer -> Developer Tools) and select the “Console” tab.
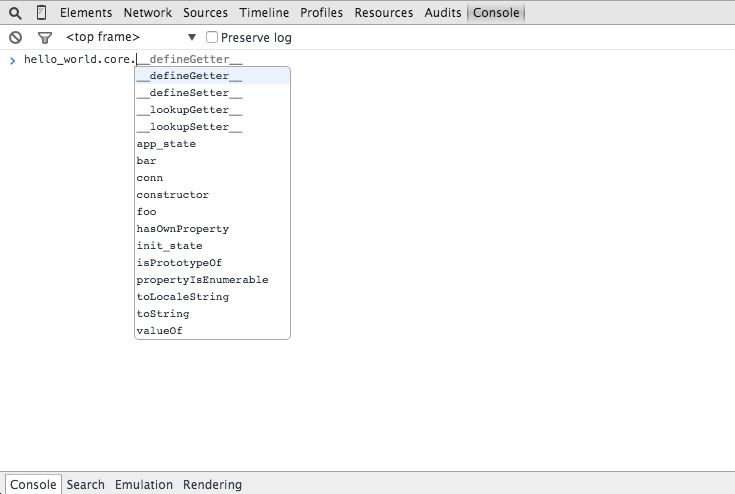
At the prompt start typing hello. The console should complete “hello_world” for you indicating that it’s an object in the global JavaScript namespace and which is “known” to Chrome.
(Notice that the original dash in hello-world has been turned into an underscore “_”. This is a feature of the ClojureScript compiler and happens to all names that contain dashes).
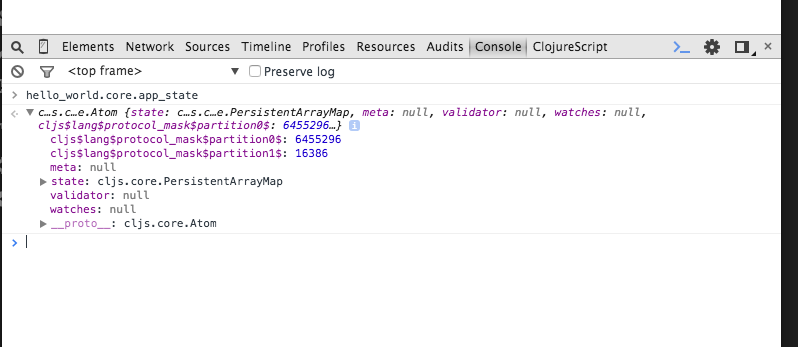
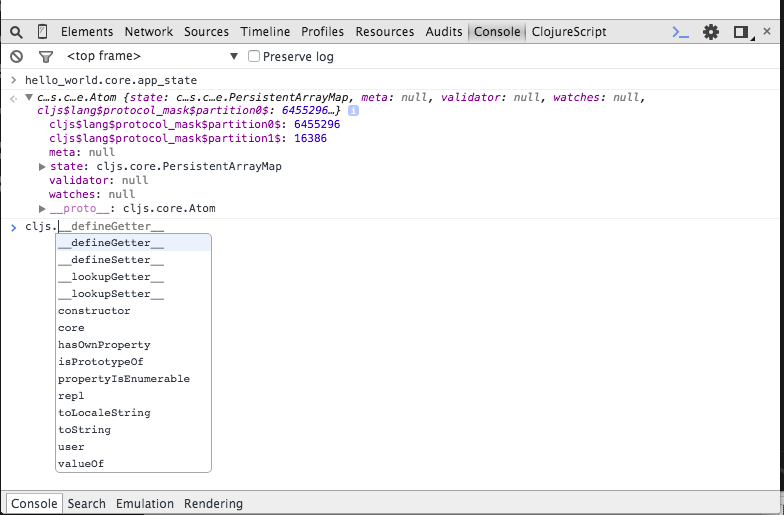
The JavaScript object equivalent of our ClojureScript var is: hello_world.core.app_state but instead of a ClojureScript atom it’s a JavaScript object of type “cljs.core.Atom” which we can see if we invoke the object in Dev Tools:
Exploring ClojureScript Core Namespaces
So we’ve seen how to access your ClojureScript vars from the REPL and where they are and what they look like in the browser. Now let’s explore what other namespaces we have to play with.
While there’s no simple command like Clojure’s all-ns to show all namespaces at the ClojureScript REPL[1], a little digging into the internals of ClojureScript will turn up what we’re looking for. Chrome Devtools is helpful again in this case:
The ClojureScript functions are contained in the cljs object. Start typing ‘cljs’ in the DevTools console. You should see a list of JavaScript objects that are available in the global JavaScript namespace (if you don’t see a popup, try refreshing the browser page).
In addition to the native JavaScript functions associated with the “cljs” object (valueOf etc.) we also find:
We already know about the cljs.user namespace so let’s explore the cljs.repl namespace from our ClojureScript REPL. Go back to your terminal and type:
cljs.user=> (dir cljs.repl)
apropos
dir
doc
err-out
find-doc
print-doc
pst
source
nil
Interesting. Here we see our old friend dir and other useful functions that are automatically required into the cljs.user namespace when the browser REPL starts up.
doc is essential for learning the ClojureScript core functions:
cljs.user=> (doc reduce)
-------------------------
cljs.core/reduce
([f coll] [f val coll])
f should be a function of 2 arguments. If val is not supplied,
returns the result of applying f to the first 2 items in coll, then
applying f to that result and the 3rd item, etc. If coll contains no
items, f must accept no arguments as well, and reduce returns the
result of calling f with no arguments. If coll has only 1 item, it
is returned and f is not called. If val is supplied, returns the
result of applying f to val and the first item in coll, then
applying f to that result and the 2nd item, etc. If coll contains no
items, returns val and f is not called.
nil
And find-doc is great if you don’t quite know which function you’re looking for.
cljs.user=> (find-doc "reduce")
-------------------------
-kv-reduce
([coll f init])
Reduces an associative collection and returns the result. f should be
a function that takes three arguments.
-------------------------
-reduce
([coll f] [coll f start])
f should be a function of 2 arguments. If start is not supplied,
returns the result of applying f to the first 2 items in coll, then
applying f to that result and the 3rd item, etc.
-------------------------
... and a ton of other stuff (elided)...
So, what’s available in the other clojure namespaces like cljs.core?
cljs.user=> (dir cljs.core)
*
*1
*2
*3
*ClojureScript-version*
*e
*flush-on-newline*
*loaded-libs*
*main-cli-fn*
*print-dup*
*print-fn*
*print-length*
*print-level*
*print-meta*
*print-newline*
*print-readably*
*target*
*unchecked-if*
+
-
->
->>
... elided ...
Whoa billy. That’s a lot of stuff.. you’ve probably figured out already that’s where the bulk of the ClojureScript functions live. Ok, so what happens if you add a new function to hello-world.core and want to make it available in the running browser environment? Let’s try it!
Interactive REPL Development
For me interacting with your running application is what REPL-driven development is all about.
Let’s add a simple function to our hello-world.core namespace by editing the core.cljs file. In your editor add something like the following simple function:
(defn bing [n d]
(/ n d))
Save the file. Because we have the :watch option specified in repl.clj the file should be compiled automatically. Now go back to the REPL to check if it’s in the namespace:
cljs.user=> (dir hello-world.core)
app-state
bar
bing
conn
foo
init-state
nil
Great! now let’s use it:
cljs.user=> (hello-world.core/bing 10 5)
TypeError: Cannot read property 'call' of undefined
TypeError: Cannot read property 'call' of undefined
... elided ...
Bugger.. what happened? If we go back to the browser and inspect the hello_world.core object we see that the bing object isn’t there:
However, if we refresh the browser and we inspect the var again we see that bing is now available in the hello_world.core object:

And if we try to call it from the REPL everything works as expected:
cljs.user=> (hello-world.core/bing 10 5)
2
But be aware that if you refresh the page, the browser will re-download your application from scratch and any in-memory vars that you updated from the REPL will be blown-away (not what we want).
Remember when we updated the app-state with a :player1 key? Well, it’s not there anymore:
cljs.user=> hello-world.core/app-state
#<Atom: {:text "Hello, this is: ", :numbers ["one" "two" "four"]}>
Damn. Luckily there’s an easy way to update the application while it’s running in the browser. Just use the :reload option in the require function like so:
cljs.user=> (require '[hello-world.core :as hello] :reload)
nil
Whenever you modify and then save a ClojureScript source file that is being watched (in our case any cljs file in the src directory) you will need to require the namespace again with the :reload keyword to make it available in the execution environment (in our case, the browser). The :reload option appears to be quite smart and maintains the browsers internal state so functions defined before the reload are available after the reload (but I’m not 100{2613636e9c0ce347f6beeeae54af0a1ea89889b5976f2999c26e569625966651} certain about that so don’t quote me!).
That’s It!
I hope you’ve enjoyed this romp through the ClojureScript REPL and it helps you with your own explorations. We’re only just scratching the surface of what’s possible but you now have the tools you need to figure out more advanced interactions. Comments, corrections and suggestions for improvements welcome! Happy trails.
[1] While ClojureScript does implement a function called all-ns in the cljs.analyzer.api namespace it’s for use by the ClojureScript compiler and not available at the ClojureScript REPL. It’s possible there may be an all-ns available from cljs.repl in the future.
[2] Thanks to Mike Fikes for pointing this out.

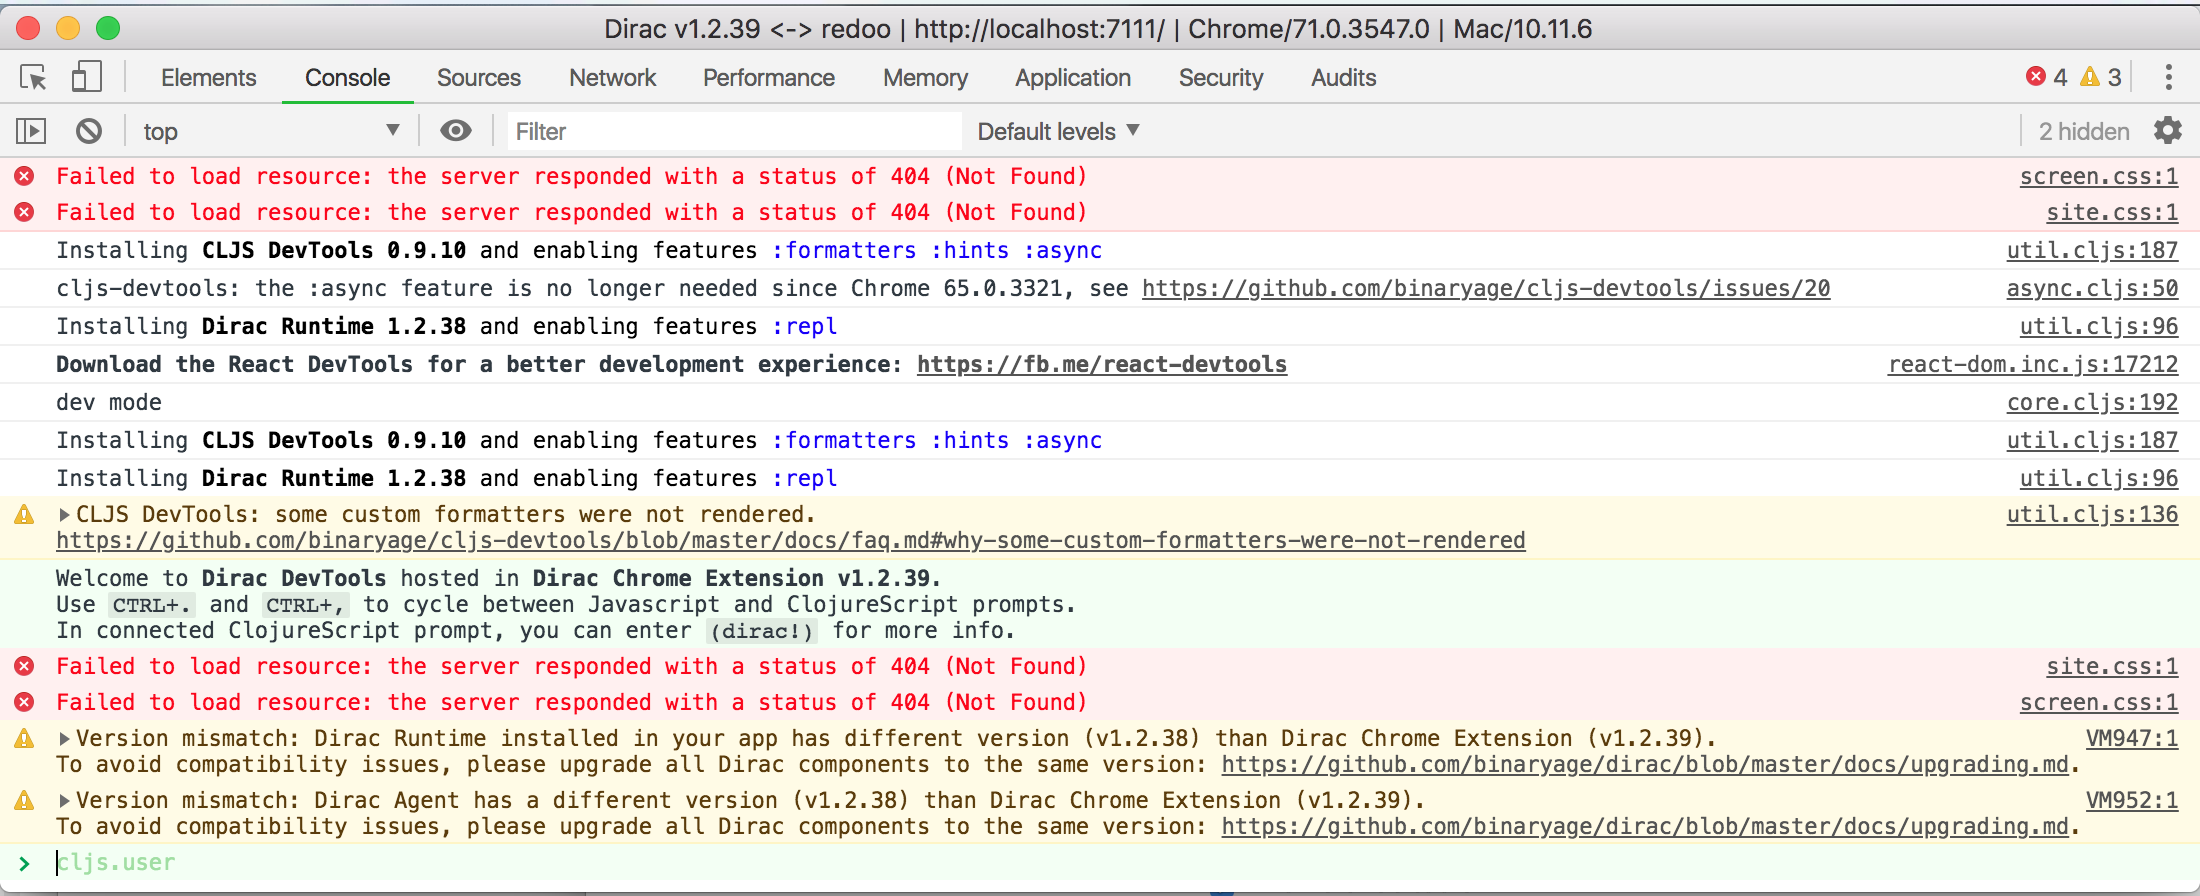
 To work it’s magic, Dirac uses a Chrome extension that establishes the connection between DevTools and your application’s nrepl server.